Monday, November 30, 2009

Soup Base Recipe


I know, you thought I'd never get around to posting the recipe for the soup base. Well, here I am and here it is...

(btw, I got the recipe from my neighbor, so thank you to her. And I called the extension office to check on the "safety" of canned soup. The only thing they said was to NOT add any rice, tapioca or barley (thickening agents). They didn't give a real reason, just said it made your soup NOT SAFE.)

Canned Soup Base

Fill each jar with:
1/2 tsp. salt
dash garlic
1 TBS. heaping bouillon
1 TBS. parsley
1/4 cup onion
1/3 cup celery
1/3 cup carrots
Fill the remainder of the jar with potatoes and water.
Leave one inch headspace.
Put lids on the cleaned rims of the jar.
Pressure at 13 lbs for 40 minutes (or whatever your pressure cooker altitude cooking is for potatoes, since they cook the longest when canning.)

Enjoy... you can make this into a potato cheese soup, clam chowder or beef stew.


A few tips and notes that I would do differently: I would make chunkier carrots and celery. I used my food slicer/shredder and they turned out thinner than I would like.
And I used a soup base bouillon type seasoning. I think I'll try the actual cubes next time. I think the soup base is now overcooked.

Otherwise, we tasted it the other day and really enjoyed it as a cheesy potato chicken soup.

Wednesday, November 4, 2009

Potatoes - fresh and canning

Need some good, fresh, Idaho potatoes for your Thanksgiving dinner? (or any other meal, for that matter?)

Well, we are making them available in 50 lb boxes or bags. Prices range from $5.00 for very large spuds, $10.00 for a variety of sizes to $15.00 for consistently sized potatoes. Those are the prices for now, anyway... (fall of 2009)

Let me know if you are interested in getting any. We have a cellar full.

They are Russet potatoes - aren't they pretty (as far as potatoes go)?


Last week, I got ambitious and even made bottled soup base with some of my potatoes. I'll get the recipe to you soon. I am way excited to use this bottle to quickly make soup someday.

Oh - and for those serious canners out there... I talked to the ag extension office about making soup base and they said it is usually okay (safe) - as long as you don't put any thickeners in - like rice or barley!

This jar has a few seasonings and is mostly filled with veggies... more on that coming soon.

Until then...

Friday, October 23, 2009

Freezer Corn

How do you freeze corn - do you make a special concoction for creamed frozen corn, or just blanch it and freeze it?

A little background: We (including my brother-in-law and his family) grow corn by the acre (seven acres to be more specific, this year). When the corn is in season, we have some outlets and we sell it locally (at my house). Over the last few years, I have found my favorite sweet corn to use - the later ones that are the sweetest make the best frozen corn.

I also found some time to freeze some twenty dozen this year.


Here is my basic corn freezing recipe:

Remove husks and silks from corn - though, don't be too particular about getting all the silks.
Blanch corn for 4 minutes. (meaning cook in boiling water)
Remove from hot water and place in (a sink of ) cold water. Cool briefly.
Use your favorite knife to cut the corn from the cob. Scoop into a freezer safe bag. Fill bag, leaving some room for expansion in the freezer. Squish the air out of the bag. Place in freezer.

Thaw and cook. Add butter, salt, and pepper to taste.

I hope that all made sense to you. Enjoy!

Wednesday, October 21, 2009

Real Concord Grape Juice

Do you know about the health benefits of concord grapes? I know they are supposed to be good for your heart health, but I need to learn more, I suppose. I just know they are really good for you...

Well, this year, I had the "opportunity" to get some concord grapes through our fruit stand. They were pricey, but I didn't have anyone else to buy them, so I took an afternoon and made grape juice. It would have been fine if I didn't have to go through each bunch looking for moldy ones. (Note - I got to them as fast as I could - three days was just too long.)

I ended up doing (and sorting) 50 pounds worth of grapes. Boy, did they smell good - and look good, mostly.


After sorting and washing them, I threw them into my trusty juicer/steamer. The house radiated the smell of sweet grape juice.


And into the bottles for a quick water bath of 10 minutes. I ended up with about 12 quarts of actual juice.


Lessons learned: If you get grapes, do them the day you get them. Concord Grapes make amazing juice. Free grapes are best. Buying Concord grapes make really expensive juice.
Buying real 100% grape juice from the store seems way more worth it - no matter the cost. But I will hoard and enjoy every last drop of the juice that I made.

Monday, October 19, 2009

Bottled Peaches 2009

Aren't these BEAUTIFUL!?! I just wanted to show off some of the peaches I bottled this year.

If I remember correctly, these are a peach variety called Flame Crest. They are tasty and pretty - all in one. And they canned up nicely, too. I was impressed with this variety.

I also did a variety called Diamond Princess this year. It was a new variety to me, but it was a decent canner.

Would you like to know the hardest part about canning this year? I barely found time to do it between running a fruit stand and a household. Note for next year: Hire someone to run the fruit stand for a few days during the week.

Saturday, October 17, 2009

Frozen Peaches

Over the next few weeks, I am going to catch up with all the canning and things that I've been up to. I know it is probably a little late for you to do it this season, but I am hoping you can get some good ideas for next year. So, watch for lots of new posts.

Now, I have a few thoughts on frozen peaches. Typically, I have had bad experiences with them. I have done the frozen peach slices - individually frozen on a tray then all placed in a bag and I have even tried one suggestion of washing the fuzz off of the peach with hot water and putting the peaches - whole - into a bag - skins and all. Then to eat them, you just thaw them under hot water and eat them. That was supposed to turn out just like a fresh peach. Not so - at least not in my freezer. I ended up throwing most of those out to the cows - most of my frozen peach experiments turn to mush.

This year, I had a new suggestion given to me from a friend that I was excited to try and I did it! So far, I haven't tried the end results, but I have very high hopes for this recipe and actually using it. Ready?

2 quarts sliced (or cut up) peaches
1 cup sugar
1 teaspoon fruit fresh

Mix sugar and fruit fresh together and stir into sliced up peaces. Stir and allow to sit for a minute before you stir again. Make sure sugar mix is completely dissolved. Pour mixture into freezer bags. Label your bags. Freeze.

Thaw to use as a pie filling, ice cream topping, smoothie ingredient, or more - I'm sure the options are endless. Only limited to your creativity.
So, here is the mixture - in the stirring, sugar dissolving process.


I put it into quart bags. Make sure to leave room for expansion during freezing.
And frozen - in my freezer. Isn't it pretty? I can't wait to try it!

I know - it makes you want some frozen peaches, huh? =)

Friday, October 16, 2009

Apple Juice

I went to a demonstration this week on "All Things Apples" - in particular, the guy showed us how he makes apple juice. I'd never seen his method before, so I thought I'd share his way, and my way.

His way: He used a cider press. He took raw, whole, washed apples and threw them into his press. He said freshly picked apples gave more juice. He showed us how to run the press - squeezing juice out the bottom of the press. It was all very interesting. Then he dumped the juice into a large pot and boiled it. He scooped the foam off of it - said it didn't taste good at all - and then put it into bottles that he had been heating (boiling) and put a lid and a ring on the jar. He said that pasturized it and then he put it on a table to seal.

My method: Wash, quarter and trim apples for worms, blossoms and dirt (stems), throw into a steamer/juicer and cook the apples down. Juice comes out the bottom of the juicer. Pour juice into heated bottles and top with a lid and ring. Water bath 10 minutes in a water bath canner.


The best apple juice I have tasted comes from a mixture of apple varieties - not just one variety, so don't be afraid to "mix it up." This is also true (usually) for applesauce. (Although, I really like the Summer Red applesauce I made this year all by itself.)

Also, check out this post from last year: Apple Juice, Show and Tell

Monday, September 28, 2009

Applesauce

Does anyone not know how to do applesauce?

During part of the fruit stand chaos, I found some time to do some applesauce. This is how it turned out:


The space at the bottom is all the extra juice - you just stir it up when you open the jar and it is totally fine and yummy. (I've had a lot of people ask about it when they saw it sitting on my cupboard.)
This year, I used some apples called summer red apples - they are a softer apple, so they cook down pretty quickly, and they were so sweet and yummy, I hardly added any sugar at all. I really prefer to use "free" apples from someone's tree, but these were available and needed using and I didn't pay much for them, so for future reference - Summer Red apples are great for applesauce!

Do I need to add instructions on how to make applesauce?

NOTE: I use my steamer/juicer to cook the apples down - then I don't have to worry about burning my apples! Then I just mix the apple juice back into the sauce (most of it).

I love fall and harvesting!

Sunday, September 27, 2009

Reasons why...

...I forgot to blog? to seem to be missing in action?

This is the main reason: I have been running my own fruit / produce stand out of my garage. Below are pictures of our biggest week- we had 11 pallets of fruit delivered - if I remember correctly. Tons of peaches, pears, nectarines, pluots, apples and more. The crazy thing - I tried to do most of it myself. However, I did have help this week- thank goodness - and since then.
It has been an adventure and one we will do again next year. We have also been involved in the Rexburg Farmer's Market every Friday evening. (The last day for the market will be Oct. 9 - so if you are local, don't forget to come for two more weeks.)

I just ordered my last "big" order and got it last Thursday. So, things are winding down - I'll be able to blog better on the other thing that have been going on. (Like things I've baked and canned and new things I've tried.) I know lots of the things to come would have been more helpful a few weeks ago, but maybe it will give you inspiration for next year. We can only hope!

Talk to you again soon.


Good times - and good memories of these last several weeks.

Thursday, August 27, 2009

Canning Recipe for Salsa

Here is a good recipe if you would like to bottle your own salsa.
It isn't too hot and for me - it is just perfect.
Try it... the hardest part of making salsa is cutting up all the vegetables.

(Note: Thanks to my sister for allowing me to use pictures of her salsa.)

MariCia Salsa

6 qt peeled, cut up tomatoes
4 lg green peppers, chopped
2 lg (or 4-5 medium) onions, chopped
12 jalapeno's (use all the seeds for a medium zing, take out some of
the seeds for very mild)
*use gloves to handle these, don't touch your face!
4 large cloves garlic, chopped
1/4 c. lemon juice
1 c. vinegar
2 T. canning salt
2-6 oz cans tomato paste
2 -15 oz cans tomato sauce
1/2 c. sugar
2 t. cumin

Bring to a simmer, cook for 1 hour on medium, stirring occasionally to k eep from scorching.
Pour into clean pint jars while hot, water bath for 35 minutes. Makes 16-17 pints.
To make a hotter salsa, you can add 4 fresh hot red chilies, chopped.

Tuesday, August 18, 2009

Quick and Easy Salsa

It is practically salsa season and we dream of making salsa soon, but while we await the tomatoes to ripen, here is a quick recipe to enjoy. It makes a nice, mildly sweet salsa. I prefer this to any other salsa, right now.

By the way, I didn't have any of these cans of tomatoes in my food storage, but since I've decided I really like this recipe, I keep a stock of these cans in my food storage for making salsa.

Also, I don't really know who to credit this recipe to. I got it from my grandpa last year and I'm not sure where he got it. So, whoever came up with it - I am grateful and just want to say thanks. I love it!

Quick and Easy Salsa
1 can sliced tomatoes with onion, celery, and bell peppers (I like to chop these more and sometimes puree before adding the rest)
1 can diced tomatoes with jalepenos in rich juice
1 can diced tomatoes with sweet onion & roasted garlic in rich juice

dice or puree as desired
Add:
2-1/2 Tablespoons vinegar (apple cider vinegar is preferred)
2 Tablespoons brown sugar
1/2 small fresh onion (optional)
little parsley (optional)
can add more jalepeno, if desired

NOTE: I only found some of these varieties of tomatoes in the S&W brand.

Mix up and serve. It also stores well in the fridge for several days.

Thursday, August 13, 2009

Peaches are here - make pie filling

I have talked about peaches and peach pie filling to several people lately and some of them really want my peach pie filling recipe... so here is where you go (on this blog) to get the recipe:

Peach Pie Filling with Recipe

(And a picture to entice you)

Try it - it is so incredibly yummy. It is usually the first to go when I make it into a crisp or anything and take it anywhere. It is sweet, but not too sweet.

By the way, for those really interested in peach varieties, I used summer ladies in this recipe last year.

Friday, August 7, 2009

Zucchini (with cake recipe)

I believe that growing a garden is part of maintaining food storage. If you are in an area where you could possibly grow something - whether it be in a full-out garden or in a pot in your house or apartment - gardens are part of food storage.

Around these parts, we have zucchini, and typically, a lot of it.

I don't love to preserve zucchini by itself. However, I know one person who gets lots of zucchini, makes A LOT of zucchini bread and freezes the bread - ready to eat as long as it lasts. Just a thought...

Today, I made zucchini cake and thought I'd share the recipe with you. Look for items from your food storage - hopefully you have everything and don't have to run to the store for any ingredients.

Enjoy.
Zucchini Chocolate Cake

1/2 cup applesauce (to cut the fat)
1/2 cup margarine
2 cups sugar
2 eggs
2 teaspoons vanilla
2 and 1/2 cups grated zucchini
2 and 1/2 cups flour
4 Tablespoons cocoa
1/2 teaspoon baking powder
1 teaspoon baking soda
1/2 teaspoon ground cloves
1/2 teaspoon cinnamon
1/2 cup sour milk (to sour, use 1 Tablespoon vinegar or lemon juice and fill the rest with regular milk. Let sit for a few minutes to sour.)

Mix well. Sprinkle with chocolate chips and/or nuts. Bake in 9x13 pan, greased and floured, at 350 degrees for 35 minutes or until toothpick comes out clean.


This cake turns out so moist and good, you don't need frosting - just a tall glass of milk to accompany it.

Wednesday, August 5, 2009

Sweet Cherries in Food Storage

So, part of our recent fruit stand adventures have included cherries. We bought these beautiful, LARGE, sweet cherries by the bin. That means about 400 pounds worth to prepare and sell at the farmer's market and to whoever else signed up and wanted some.

We had the crazy idea to put them in the back of our vehicle in order to keep them more temperature controlled. It worked - here are the pictures to prove it!


We had a few people who forgot to pick up the fruit they had ordered. After a few days, cherries don't last, so I started canning cherries. This is a first for me - I'd never bottled cherries before, but they were so easy! Just wash them and remove the stems. Pack them in a jar with a light sugar syrup and process the jars in a water bath canner. Easy. And they are so pretty! I haven't wanted to open a bottle yet to see how they processed, but I'm sure they are still just as sweet and good as before I put them in .

Here is the middle of processing. I ended up with 20 jars to put in my food storage on my shelves. We love to have good food when we want to eat it in our storage.

(How is your storage coming? Do you have any questions, concerns, inspirations?)

Monday, August 3, 2009

Yummy Glazed Chicken

Another recipe that uses apricot or peach jam that is really easy and delicious is called Yummy Glazed or for a better description, Apricot Glazed Chicken. I wish I knew who to give credit to for this recipe. I just know that one of my aunts introduced it to my family.

So, without further ado, here is the recipe for your use:

Yummy Glazed Chicken

Note: I got the picture from my sister's food/recipe blog. Check it out for more "in-process" pictures and ideas for foods and leave her a comment for me. Click here for her blog: Taste The Joy


1 small jar apricot or peach jam

1 pkg dry onion soup mix

1 (8 oz) bottle Russian salad dressing

¼ C water (put the water into the empty dressing bottle to get out as much dressing as possible)

Mix together and pour over 4-6 chicken breasts in baking pan. Cover. Bake 350 for 1 hour or till chicken is done. Serve over rice.

Enjoy.

Saturday, August 1, 2009

Sweet and Spicy Chicken (with secret ingredients)

Where do I start?!? (I think I forgot how to blog!) I apologize for my blogging absence. (I have written several blogs in my head that never made it to your view. Oops.)

First, we have been swamped with running a bit of a local fruit stand and participating in our local (Rexburg) Farmer's Market. After working with that most of the week, and going to pick up fruit across the state one day a week, I am generally wiped out.

However, since I have been thinking and preparing things to write, I will attempt to share some wonderful ideas with you that I've been working on...


One of the yummy fruits we have been getting is apricots. They are about done now, but for those of you who still have access to apricots or have apricot jam in your food storage wondering how to rotate your food in good time, here is a yummy way to use your jam - aside from the typical toast and jam idea.

Recipe for Sweet and Spicy Chicken

Note: I got the picture from my sister's food/recipe blog. Check it out for more "in-process" pictures and ideas for foods and leave her a comment for me. Click here for her blog: Taste The Joy

Cut 2 uncooked chicken breasts in ½ inch squares. Toss with 3 TBS taco seasoning. Brown in oil.

Add:

1 to 1¼ C Salsa

½ to ¾ C peach or apricot jam

Simmer together and serve over rice.

DONE!

This recipe is almost too easy to make and it tastes so incredibly good. It is one of my favorites.
(Look for other ideas coming soon.)

Thursday, July 9, 2009

Berries

I found the nicest people to work with for berries. And I am so excited to develop a relationship with them and hopefully get a good deal on berries from here on out.

They have marion blackberries (a smaller seeded blackberry), blueberries, red raspberries, strawberries, loganberries and more.

I've got to get the order placed soon (tomorrow), so I just thought I'd update you with what I've been up to these days.

If you'd like to be added to my email list for updates when we get fresh fruits and veggies in, please let me know and I'll add you. It is quite the adventure and we are having fun doing it.

Tuesday, June 30, 2009

Amazing Cherry Pie Filling (with Recipe)


Okay, so I've been asked for the recipe enough, I need to just print it here on my blog - and as promised yesterday that I would publish it today... here it is:

Cherry Pie Filling
yields about 7 quarts of pie filling

Ingredients:
6 quarts pitted cherries (I use sour pie cherries)
7 cups sugar
1-3/4 to 2 cups clear jel-A
1 teaspoon cinnamon (optional)
9-1/2 cups cold water
2 teaspoons almond extract
1/4 teaspoon red food coloring
1/2 cup lemon juice (bottled concentrate, not fresh)

Combine sugar, clear jel and cinnamon in a LARGE pan. Add water, almond extract, and food coloring. Heat on medium until it boils and thickens. Add lemon juice. Boil 1 minute. Fold in cherries. Fill clean bottles to 1/2 inch from the top. Process in a water bath canner for 40 minutes at 3001-6000 ft altitude. (For other altitudes, feel free to contact me for the variations.)

Remove and Let cool so seal will set.

Enjoy.

p.s. I have really only been able to find clear-jel A in only a very few places. One place is out of state, the other place has been my local health food store. Try that, if you don't know where else to look.

Monday, June 29, 2009

Cherries are in Season


I received a question a few days ago about what to do with cherries. Well, here are some ideas - since cherries are now in season in Idaho.

First suggestion is a post I did a while ago - great pictures and talk about cherries: homemade-american-cherry-pie-filling

I have friends that love to dry (dehydrate) cherries. It is very easy to do - just pit them and "break their backs" by turning the flesh out so they dry better. Place them on a tray and in the dehydrator for a few hours until dry.

Next suggestion would be just canning cherries - like rich flavorful Bing cherries. You want to make sure you can the flavorful ones - not just the early cherries that don't have much flavor to them. So, how do you bottle cherries? you ask.

Well, here are some guidelines for easily canning sweet or pie cherries:

Wash cherries. Remove pits, if desired.

(My favorite method for cherries:) Raw Pack - Pack cherries. Shake jar to obtain full pack. Cover cherries with a boiling syrup (I use a light syrup - using about 9 cups water and 2-1/4 cups sugar. Boil until clear.)

Then you water bath process them (at 3001-6000 feet) for 35 minutes. If you live at a different altitude, feel free to contact me for the changes in information.

I use (sour) pie cherries for cherry pie filling. They usually come on later in the fall. I'll post the recipe tomorrow, so I don't overwhelm you with too many options and recipes at one time in the same post. =)

Thursday, June 25, 2009

Farmer's Market


The last week or so, our life is revolving around getting ready for the Rexburg Farmer's Market. Our first market will be tomorrow (Friday, June 26, 2009) from 4-8 pm in the Rexburg Tabernacle parking lot (between the Tabernacle and Taco Bell).

They are planning to have a very family oriented evening with a firetruck to explore (barring there are no fires), old tractors, live music, and other fun things, plus all the vendors to explore at the market. Sounds like it will be a fun time.


Our booth will be full of fresh fruits and veggies (especially as the season progresses - corn will be in August), we will also have hard white wheat available, spelt (as long as supplies last), flaxseed, and of course we will feature our Geneva Springs handcreams.

Other booths I hope to visit will be the chocolate truffle booth, homemade granola booth... there will also be crafters for cards, baby items, etc.

So? Are you coming? If you do, make sure you say hi to us at our booth. We are looking forward it.

Hope to see you there. (Assuming you live in Idaho.) =)

Wednesday, June 10, 2009

Flaxseed = 1 Egg


You know how you use eggs in a lot of recipes? Do you have powdered eggs in your food storage for when you happen to run out? Or if the egg industry totally tanks and no eggs are to be found?

What will you do?

I just found a great substitution for eggs! Flaxseed. It works great if you are trying to prepare more vegan meals, or really you just used the last egg for something else. Flaxseed adds a little bit of a nutty taste, but it works great for substituting eggs in muffins, waffles, cakes, breads, cookies, and the like.

Another bonus? Whole flaxseed will last practically forever in your food storage, so you can always have some on hand for when you need it. Just grind it before you use it so your body will be able to absorb the maximum nutrition from the flaxseed.

Here is what you do:

Grind 1 Tablespoon (golden) flaxseed in a small coffee grinder
Add to 3 Tablespoons water (in a small bowl)
Whisk together.

Ta da ... you have a great substitution for 1 egg by following this quick and easy recipe.

Try it... you might like your recipes better with this substitution!

p.s. Flaxseed can also substitute oil in some recipes, too. More on that later.

Wednesday, May 20, 2009

Steam Canner - Not Entirely Safe


So, after I created and went live with my canning page and products, I started hearing rumors that these steam canners are not recognized as safe in most states.

Utah used to recognize them as safe and I think they were the only ones, but now I understand they have restated their position.

These steam canners are supposed to replace water bath canners for processing acid foods.

Some of the benefits of steam canners are promoted to be:
less time to pre-heat
less water used
cannot boil over
saves energy
less time to return to a boil after jars are placed on the rack


I've been discussing the issue with the University of Idaho Cooperative Extension System. Here is their position:

"There are some major problems with the use of steam canners for canning acid foods:

* Cold Spots: may occur due to pockets of air trapped between jars or under the dome. The temperature in these cold spots can be below 212 degrees F.

* Release of steam may occur if heat is maintained under the canner at too high a temperature. The increased pressure may build to a level high enough to life the lid off, allowing much of the steam to escape and cool air to enter reducing the termperature.

* Increased jar breakage may occur since jars are not separated bya rack in the canner.

* Underprocessing may occur because home canners may not be able to differentiate between steam and an air-steam mixture. Water begins to give off a vapro, which can be mistaken for steam, at tempreratures as low as 170 degrees F.

* Uneven heating may occur since jars are not separated by a rack in teh canner. Jars may be jammed next to each other so the steam cannot equally penetrate the jars from each side.

* Steam burns may occur since it is difficult to remove the dome cover safely.

The USDA Center for Excellence in Food Preservation has conducted research on steam canners. They found the maximum temperature of the product being canned was significantly lower in products canned in steam canners than in the same food canned in a boiling water bath. The lower termperature resulted in less killing power of bacteria, underprocessing and considerable risk of ecomonic spoilage. The USDA and University of Idaho do not recommend the use of steam canners for hom canning of acid food."

(And low acid foods should be pressure cooked/canned.)

So, even though it is a great concept, it seem to have some flaws. If you are thinking of purchasing a steam canner, you might reconsider for the safety of your food and most importantly, your family.

I am pulling the steam canner page from my site. I'll start looking for someone who can wholesale me a quality water bath canner.

Until next time...
Jamie

Information is power.

Wednesday, May 13, 2009

Passionate about farming

So, my husband came upon a new site the other day. He was really excited to read the articles it had and the information seemed accurate and informative. It is all about farmers and what really takes place with us.

If you are not a farmer, I still recommend you click on the link and check out this site http://www.thehandthatfeedsus.org/ - I especially love the farm policy fact of the day.

Here are a few for you that you may or may not know:
“Burn down your cities and leave our farms, and your cities will spring up again as if by magic; but destroy our farms and the grass will grow in the streets of every city in the country.” - William Jennings Bryan

"The farmer is the only man in our economy who buys everything at retail, sells everything at wholesale, and pays the freight both ways." - President John F. Kennedy


Did you know those facts? They are true.

Do you want to know why Wheaties prices (General Mills cereals in general) are going up?Check out the website and this article: http://www.thehandthatfeedsus.org/farm2fork_its_grrrreat.cfm
Did you know that farmers are in the same boat as many other people? Yeah, sure, you may have heard that wheat was up to $12 a bushel last year, but now we are somewhere between $4 and $6 - depending on what type of wheat we are selling. And we weren't making tons of money last year (if we sold our wheat) because all of the input costs (like fuel to drive tractors and trucks, fertilizers, and payroll expenses) are just skyrocketing along with all the other prices of everything. At best, we might break even and hope to stay in business.

Did you know that something like 70% (I couldn't find the article again) of the government farm bill went towards the food stamps program!?!? I know farming and food are connected, but seriously, how are food stamps helping agriculture and farmers? Money should go where it really helps - like to control the deficit.

Okay, I'm done ranting and raving for a moment. So, support farmers by learning more about them (us) on this site: http://www.thehandthatfeedsus.org/ and then tell your friends and educate them.

After you check out the website, let me know what you think about it. I would love your feedback.

One more time: http://www.thehandthatfeedsus.org/

Talk to you soon...

Tuesday, May 12, 2009

Pruning Photos, as promised

As promised, here are pictures of our pruning adventures. Only the "after" pictures though - sorry.

So, if you don't know much about pruning, allow me to tell you a little bit about it.

First, you want to prune trees annully, starting when they are pretty small, so they don't get out of control and the tree can focus on maybe 7-8 good, solid branches on which to really produce good fruit. (This advice works with lilac bushes, too.) Otherwise, the tree doesn't know where to focus and you may get hundreds of tiny little apples or fruit that are hard to do much with. Ever had that happen? (I have.)

Next, you want the branches to have room to move and grow with a couple of inches between each one.

This example looks cluttered in the picture, but in real life, it looks pretty good. Boy, you should have seen it before its makeover. This is a COMPLETELY different tree. It has what is called a "central leader" type of pruning where you allow a solid central branch to grow and produce.

This tree also had a serious makeover. You want to make your branches relatively low, so you can stand on the ground and pick your fruit. You don't really want to make ladder fruit trees. That is no fun at all. So, if the branches branch out (like below) you will have more success. Plus the sun can more easily reach and nurture the entire tree.

This is the "vase" method where you basically cut out the center of the tree so the sun can easily access all of the tree and its fruit.

Here is a close-up of an example branch. You look for opportunities to branch out from the tree and cut out the ones that go straight up or down. See where it kind of looks like a hook of some sort? That is what you want.
Confession: Our trees were a little out of control because I haven't lived here very long and I am just learning. I knew trees need pruning, but didn't know how to go about it. It is possible to get them back in control, but it may take us some time.

Thank goodness for good friends and willing teachers!

Saturday, May 2, 2009

Pruning Party

I wish I had photos of before and after. I can do the after ones, just forgot the before. What was I thinking?!?!

Well, on Tuesday morning - a very rainy Tuesday, I might add - our good neighbor-friend came over and taught my husband and I a few pointers on pruning our trees. Now we will have wonderful apples (barring it doesn't freeze off all the blossoms).

Our trees were going a little wild. They had been pruned before, but were still out of control!

We learned about the vase method and the central leader methods of pruning. Each has advantages and it depends on the tree, I think, which method you choose.

When it quits raining (again today) I'll take some pictures and show you how our trees' branches are supposed to look. It is amazing - they are totally different trees!

This will hopefully get us ready for a wonderful apple harvest and lot of canning this fall. Happy Food Storage...

Monday, April 27, 2009

Spring into Summer Open House Party Announcement


Come one, come all - we are having a party! Well, an open house, really. On Tuesday. Tomorrow.

We will have vendors for jewelry, scentsy wickless candles, Dairy Maid Skin Creams, wheat, spelt & flaxseed, and possibly some fun baby accessories. And who knows what else will show up. It is like a mini craft fair... Plus, we will be featuring ME for a quick bread demonstration on rolls and bread type desserts! Who doesn't love bread and dessert in the same sentence?!?

We will also tell you all about the excellent deals on food and you can sign up to receive alerts for our fruit stand - when we get new fruit and excellent deals!

It is going to be fun and casual, so email me at info@HiStakes-Spelt.com if you want more details (like time and directions).

It will be fun... I am totally excited and getting ready for it today (and tomorrow).

Wednesday, April 22, 2009

Hooray for Food Storage!


Is anyone getting excited for gardening and harvesting and then canning that food?

I am getting WAY excited! We don't plant much around here for another week or two in our gardens (we live in a colder zone), but I have seeds ready - more things than I usually plant- and I bought lots of canning pamphlets for my friends and neighbors.

We are planning to run a fruit stand this summer here at my house. We will have loads of fruits, and vegetables available for people to eat or bottle or whatever. So, if you don't live in Idaho, I can send you this canning pamphlet (for a minimal fee, of course) - it is my best reference for canning that I have used for years.

There are three pamphlets that I use... one for fruit, one for vegetables, and one for tomatoes. It is easy to read and follow instructions and I refer to it every year to refresh my memory of canning. Plus there is an easy reference table in the back on how to prepare the food and then how long to process each type of food.

I'm getting excited - practically giddy about summer and food, gardening and this fruit stand!
Look forward to out fruit stand....

Sunday, April 12, 2009

Food Storage Room Make-over!

I updated my fruit room (a.k.a. food storage room) Saturday and today (Monday). I am so happy!! One entire wall was lined with several unused doors, wood scraps, and other random items. And these random items were blocking a couple of feet shelving in the corner that held lots of my empty jars for canning.
To fix it, I used two of the doors as shelves. I used cinder blocks to prop up the bottom shelf and as you can see, I wanted to maximize available space, on both shelves, so I used those shelf hangers (can't think of their real name right now) to hang the upper shelf. This is my new "store" area for my HiStakes-Spelt store inventory, leaving more room on the other shelves for my personal storage!
I am so happy to have maximized more space in my house (especially in this room).
Beneath the first bottom shelf, I have the small boxes of wood scraps so they are still accessible for whatever project we need them for.

And below - enough room to access all of my canning jars in the corner. I love it.
I'm not sure the picture does the space justice, but I'm posting it anyway.


p.s. Sorry there is no "before" picture. I just got ambitious and did it.

Tuesday, April 7, 2009

Food Storage Binder Give Away


My blog friends over at Food Storage Made Easy have created this cool binder that they are going to give away - actually, they will give away 10 of them! Want to be one of the ten? The rules for entry are on their site: Food Storage Made Easy

It will be the perfect combination of functional and cute, I'm sure. (Knowing them it really will be - wink, wink.)


Here is the list of things they said will be inside the binder:

  • Instructions for how to make it cute and functional, exactly like ours!
  • ALL 26 BabyStep Checklists (no more waiting for the next list!)
  • 100 pages of detailed information about each of the ten BabySteps
  • Our very best posts, handouts, and extra information
  • All the spreadsheets and documents you need to plan your 3 Month and Long Term Food Storage without needing a computer
  • Recipe Appendix including all 33 recipes that we encourage you to try out in the Checklists
  • Sections for additional research and personal notes to be added in
  • Cute cover pages and dividers (because you know we have to make it fun)
I love easy and helpful all in one spot - great idea to get it all in one binder!

Don't forget to enter their give-away before Thursday. Here is their site: FoodStorageMadeEasy.net - and even if you don't win, it is totally worth visiting their site and learning all about their easy tips. Or they will have this awesome binder for sale as a downloadable book.

Check it out at Food Storage Made Easy!

Friday, April 3, 2009

Bosch Sale - for a limited time

Have you seen this deal? If you are looking for a decent deal on a Bosch Universal Plus machine - this could be it.

This
plus this:

plus a free Bosch Cookbook equals a total of $155.00 in savings!

Your cost? Only $399.99 for the Bosch Universal, the Blender, the Cookbook, and free shipping.

Go here: Universal Plus Deal to order yours today. The sale only lasts until April 15.


Oh, did I need to convince you how wonderful the Bosch Universal Plus machines really are?

Let me keep it brief and just say this - I will NOT use anything else to make (knead) my bread. This is my favorite kitchen machine that has the warranty, the durability, and a powerful motor to boot. It is worth every penny of the investment because it will last! (Think of handing it down to your grandchildren some day.) If you want to learn more, click over to my website HiStakes-Spelt.com and read about all the wonderful features the on the Bosch Universal Plus.

Don't delay. Sales don't last forever. (To get yours, click here: Universal Plus)

Thursday, March 26, 2009

Save Money by Making Your Own Healthy Whole Wheat Bread

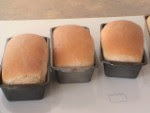
If you buy bread frequently, you could be saving money by making your own bread.

What?!? I know, you think I'm crazy by saying that, right? Well, you read that correctly. Even buying all of your supplies: your own ingredients, a Bosch Universal Plus mixer, and possibly a grain mill, you could still make money after about one year – or spend it elsewhere rather than buying bread that is not necessarily good for you.

First of all, did you know that lots of bread companies – including those who make whole wheat “good-for-you” bread – use high fructose corn syrup in their bread? If you do not know the tragedies of high fructose corn syrup in your diet, do a little research (Google it – there is plenty of information out there and I do not want that to be the focus of this post.) Plus, they use all kinds of preservatives and who knows what else. Besides, homemade cooking and baking is always better for you because you know exactly what ingredients you are putting into your food.

If you need the tools to make your bread – don’t fret. They aren’t that expensive when you look at the big picture.

I recommend using a Bosch Universal Plus machine to mix your bread. (Find a good deal on the Bosch Universal Plus and on our grain mills at HiStakes-Spelt.com.)
The Bosch Universal Plus has an excellent motor for dealing with bread dough, a great warranty, and it lasts at least 25-30 years. Very few machines can make that claim.

Check out our grain mills here - we only sell our favorite ones.


So, we did some math for you to show you how to make money by making your own bread and buy the tools you need (like the Bosch Universal Plus and a grain mill).

In the Beginning: We took an average family (we’ll call them the Smiths) who eats about three loaves of bread per week. The Smiths purchase whole wheat bread at $3.50 per loaf.

Changes: The Smith family purchases a Bosch Universal Plus and bread ingredients as listed in my 100% Whole Wheat Bread in your Bosch Universal Recipe.


Ingredients Cost per batch of bread (batch = 6 loaves)

Whole wheat flour $2.88
Golden Flaxseed $1.53
Dough Enhancer $0.34
SAF Instant Yeast $0.22
Honey $1.14
Water $0.05
(Canola) Oil $0.04
Salt $0.06

Total $6.36 for 6 loaves of bread
$1.06 for 1 loaf of bread

Savings: $2.44 (buying bread at $3.50/loaf versus making your own at $1.06/loaf.)

Weeks to recoup purchase cost of Bosch: 54.64 weeks (that is just over 1 year)
(Remember, this calculates the original bread purchase of 3 loaves per week, so I f the Smith family continues to eat 3 loaves per week, after one year, they have their Bosch paid for and are “making money” that they were using to buy bread!)
And if you need to purchase a grain mill, it will only take about 18-24 months to recoup the cost of the Bosch and the grain mill (depending on which one you choose) before you are saving all that money that you were using to buy bread. Besides, your health will improve from the increase of whole grains and fiber in your diet – what better reason to make your own bread?

This scenario worked for the Smiths and it could work for your family, too!!


Start making bread and saving money today!


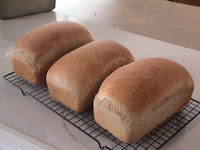
**Disclaimer, we will not be held responsible for your increased bread consumption when you make your own bread.

LinkWithin

Blog Widget by LinkWithin

What things are most Important to Store?